Sunday, March 17, 2013

Gardening: New Raised Beds!

Area Before Clearing
I am so excited that our weekend plans actually worked out! We were given and absolutely beautiful day; the perfect amount of sunshine, breeze and a wonderful balmy temperature that just beckoned us to go spend the day outside. It would have been an absolute "sin" to not enjoy the day given to us.


Newly Cleared Garden Space
 Today we cleared out the space that I decided to dedicate to more vegetable gardens and putting in raised beds along the length of it for ease of gardening, keeping the critters out, and in order to more easily build in healthy, organic garden soil in order to hopefully have a successful year. This section is also just off of the kitchen next to the patio so it will be more accessible, easier to water and hopefully to maintain and keep alive too.


The Foreman Hard at Work
The Boss Lady
Nathan and I spent most of the morning and early afternoon clearing the area of all the daffodils that have taken over the area for probably many, many years-there were several hundred of them, I also removed a couple of succulents, two rose bushes an azalea bush. We also removed lots of buried bricks, old landscape timbers, a couple of concrete stepping stones and lots and lots of weeds, roots and grass. 


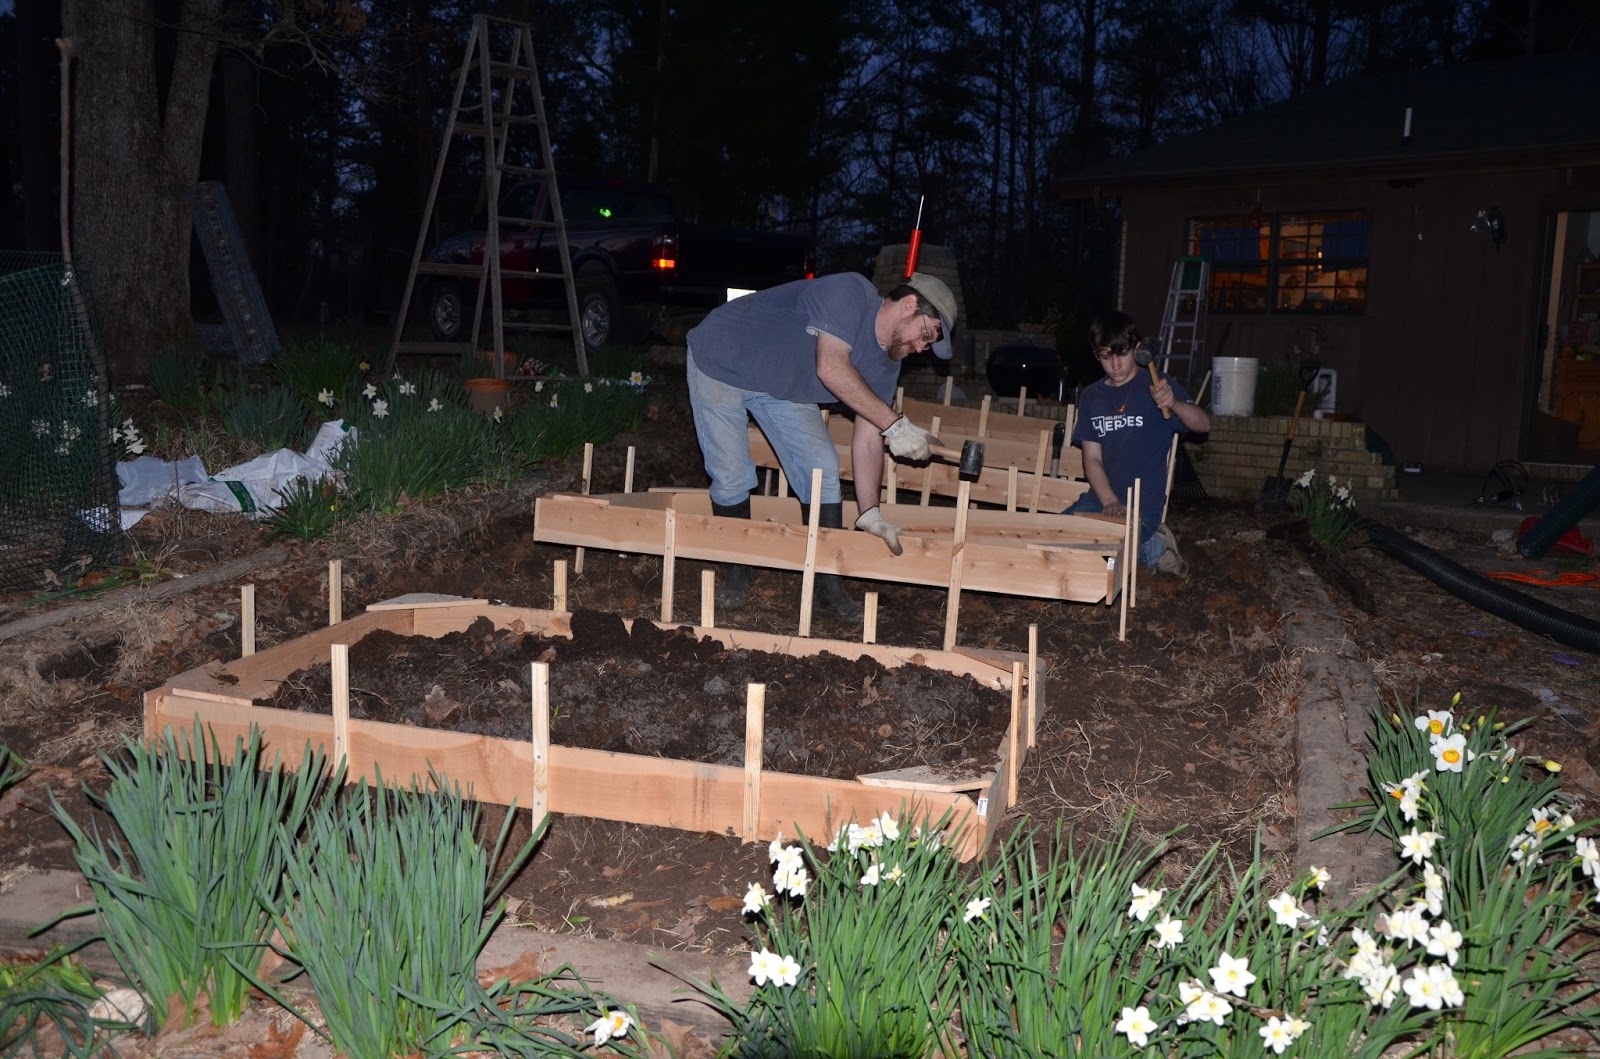
Nathan, Matt the rest of the crew spent time laying out the area, and building the boxes. Benjamin played the role of the foreman.

The ducks and chickens have been really excited to see what has been going on too. They have actively been helping to mix in the soil and remove some of the bugs that have been happily living in the dirt.  


Matt and Nathan Working Into Evening
The frames are very simple 4' x 6' boxes built with untreated cedar planks. They have been constructed so that they can be easily taken apart and moved. Also, we left extra space on the stakes to add and extra plank if wanted/or needed. We are also leaving a two foot walking path between each box to easier access each edge. Although it is not complete and will probably be an ongoing project for a while, we now I have the beginnings of four new planting beds. We are so excited about the prospect of planting these out and filling them with loads of yummy vegetables, herbs, flowers and maybe some fruit of some sort. Now the hard part is-what do we plant. 
Jacob Hard At Work
Noah Lends A Hand


Wednesday, March 13, 2013

Butternut Squash Apple Gratin


This is a new recipe that I am really excited about; it is very simple, very tasty, very quick and I think like many other recipes I come across it may even be adaptable too. After buying a bulk box of Butternut squash I had to start searching for ways to use it. One recipe I came across was a gratin using apples, leeks, and butternut squash. Personally I do not care for sage too much, and we didn't have leeks so I substituted onions and left out the sage and sherry. Here is what I did.

Butternut Squash Apple Gratin
Recipe:
1 small-medium butternut squash
2-3 tart apples 
2 onions
2 tablespoons of butter divided
ground coriander and/or ginger, nutmeg or other spices that you like to taste
salt and pepper to taste
bread or cracker crumbs(ritz would be good)
parmesan, cheddar, or other cheese that you like

Thinly slice the onions into strips and begin to caramelize them in a cast iron pot using a tablespoon of butter.

Thinly slice apples and butternut squash; I only used the neck part of the squash that was solid and saved the lower part where the seeds were for another dish. Layer the butternut squash on the bottom of the dish overlapping to cover the bottom. Sprinkle with the spices you would like to use and salt and pepper to taste. Layer the caramelized onions on top and then add a layer of apples. Add a layer of cheese, I used parmesan this time, but I think cheddar might be my next choice. If you have enough of the ingredients add another layer of each. Cover with foil and cook for about 30 minutes.

Uncover and top with the bread or cracker crumbs, more cheese, and thinly sliced pieces of butter evenly spaced over the top; bake under the broiler until the cheese is bubbly and turning golden brown on top.

Serve with sides of your choice, or use it as a side dish. We served ours with a side of sauted kale, and a fresh salad.

And just in case you are wondering, we are a typical meat eating family and there were no leftovers that night, most of the kids ate seconds.

This is a really good dish that I would like to experiment more with in the future. Adding potatoes or other vegetables might be worth trying.

Try it with your family and let me know how it turns out...What would you do differently?


Tuesday, March 12, 2013

Gardening: First Bed Finally Planted

Finally the cold wet dreary weather has been seen a lot less lately and Spring seems to be slowly peaking in here. In the last week, when the baby cooperates, we have started one of our gardens. 
The potatoes are in, although they don't seem to be doing much yet. Next to that purple and yellow onion sets have been put in. There are several kinds of lettuce, endive, swiss chard, radicchio, and broccoli. As a beginning companion planting experiment a square of spinach plants were also put in with strawberry plants placed among them for ground cover. One more small spot is left for a few kale plants to be added.

Not long after everything was set into the ground it began to rain...I love it when gardening just works out, we didn't have to use the tap water and the plants got a good drink. 

I am really glad that Matt was able to enclose the first garden area during the weekend. the ducks and chickens were patrolling the area trying to figure out how to get into it. It is definitely not deer proof, but my hope it that because it is closer to the house they won't be very interested, but that doesn't stop the raccoons from visiting, so we'll see.

This week I am hoping to build our first raised bed and put in some sugar snap peas, but not sure what is going in with them yet. We found several ideas, but first we will try using fence pickets to build a 4' x 6' bed raised two pickets high, so about 10" high. Something very easy to assemble and disassemble so that it can be moved when needed.

How is your garden progress?