Showing posts with label Recipes. Show all posts

Tuesday, August 29, 2017

Kale-uffaletta...A Punny Name


Sunday night I made a muffuletta for the family for supper. It is a Louisiana staple that developed in the New Orleans area. Italian Immigrants developed it and I am so glad that they did. It is a lovely slice of meat and cheese sandwich heaven slathered with a salty briny olive/vegetable mix that just makes such an amazing combination.

Occasionally I indulge and make it at home. It came out beautiful, but unfortunately my oldest was sure to point out that I am not able to have it so I said don't worry, I have a plan...I modified it and made a "Kale-uffuletta" for me. I got a few giggles at the cleverness of my word play, and some skepticism at the idea of it, but I proceeded to create my bacon wrapped kale, meat, cheese, and olive salad mix masterpiece. In the end it was intriguing and I would definitely do it again. It will most likely need adjustments for future versions, but for the first try I believe it was a success.


First I started by weaving a bacon blanket to hold everything together.


Then I added a couple of layers of kale to hold in all the lovely layers of meat cheese and olive mix that makes up the middle of the sandwich.


A layer of cheese. I use several kinds of cheese in our sandwiches you can choose what ever you like. This one was Swiss. On top of that, the olive salad mix.


A meat layer next. I chose a layer of black forest ham


Then cheese again. This was Colby-Jack. Then I added a layer of hard salami(forgot the picture).


...and finally a layer of smoked provolone cheese and more olive salad mix. This is truly just a preference of how much or little you prefer...most of us like olives...one does not...there is always one...


Carefully roll up the layers trying to keep the bacon blanket together so that as it cooks it tightens around the whole thing and holds it together.


They both went into the oven and baked for about 15 minutes in a foil wrap. I took the regular Muffaletta out of the oven because it only needed to heat through to warm the bread and meat and melt the cheese. The "Kale-uffuletta" had to bake until the bacon was cooked so I opened up the foil and let it bake another 15 minutes so that the bacon would crisp up a bit and brown a bit. It was taken out of the oven and let rest for a few minutes to let the cheese cool down a bit and set up so that it wasn't too much of a gooey mess.


We ate a side salad with our various versions of Muffuletta. Surprisingly, the kids were just as interested in my version as they were the bread version...it was the bacon...


It was definitely a good first try at a new creation. I will do it again definitely. I would like to try and layer in more vegetables and more kale.

As far as cooking it, it definitely needs to be cooked on a rack to make sure that the bacon, meat and cheese drippings are able to escape so that it doesn't get soggy on the bottom. sealing it in the layers of kale worked really well to keep the cheese from escaping. 

...so what do you think? Would you try it?

Sunday, May 28, 2017

Low Carb Life: Boudin

Being from South Louisiana, life isn't generally Low Carb. In fact, because of the hard working lifestyles of our ancestors and the need for frugality, many of the mealtime staples were potatoes, rice, corn, peas and beans. They were very creative in the way meals were prepared and served, many times turning what many people consider meager low country meals into fabulous dishes that are now saught after as a cuisine that is hard to beat. One such meal that we often had as a part of Saturday or Sunday brunch was boudin. It was either steamed, pan fried, or even grilled giving each a unique flavor and versatility. Boudin is basically a rice dressing (mixture of pork meat, vegetables and rice) that is stuffed into a casing(usually pork). In like other types of sausage boudin is fully cooked when stuffed and only needs to be heated to be eaten. It doesn't have the typical texture of sausage because of the rice content. It is soft and more likely to fall apart when the casing is opened. Many people eat it casing and all..I don't typically eat the casing, personally just never developed a taste for it.

So back to the topic. Making boudin low carb. For the past two months, I have been lamenting the thought of not having this lovely little meal and thinking there should be a way...and there is! I was thinking there are many people substituting cauliflower for rice so it should work...well a news feed popped up in my Facebook page almost like an answer. Someone in Louisiana tried it and it worked. I'm still skeptical after reading, but this week I tried it. It's not half bad. I still. Red to work on proportions and seasoning, but it is a start.

I made a small batch with cauliflower and made the kids and Matt the regular batch. I didn't bother stuffing this batch in a casing because it wasn't big and wasn't going to be kept for long.

I will continue to work on recipe proportions and eventually post a recipe.

Wednesday, May 24, 2017

Low-Carb Life: Cloud Bread

Cloud Bread has been around for many years. I have always found it interesting, but just never ventured into trying it, it just seemed a bit weird. Being that I have been mostly carb-less for about 6 weeks now there is a part of me that is really wanting to indulge in the "old ways".  I made my first batch and it seems like it came out pretty good.

It is not bread! It does not have the bread texture that I keep hearing claims of, but I think it will be a good vehicle for a sandwich substitute.

The recipe is not difficult, and doesn't take a whole lot of time. the next time I make it I will make several batches at once so that it can be frozen for future meals. There are claims that it works, so I will try with some of these and test the results.


Now to the Recipe in case anyone wants to try it out...

Cloud Bread
6 Eggs
4 ounces of cream cheese
1/2 Teaspoon cream of tarter
a little sugar or sugar substitute(this can be omitted)

Separate the egg whites and yolks into different bowls.
Beat the egg whites and cream of tartar until very stiff peeks form.
Mix the yolks and cream cheese and sugar if you use it until the mixture is smooth and incorporated.
fold the yolk mixture into the egg whites stirring gently so that the mixture stays fluffy and doesn't go flat.
Scoop onto a baking sheet lined with parchment paper and bake for about 15-20 minutes. Watch carefully at the end of baking so that they don't get too brown.
Take out of the oven and let cool on a wire rack.

They can be put in the refrigerator...I will test the freezer theory and update.

Update: The "breads" hold up well in the refrigerator or freezer, and although not bread I have to admit that it has come in handy when I needed something quick or wanted something a little different from what I have been eating daily. It will not be something that will be an every day meal but will be great for an occasional change to add variety.

Monday, May 22, 2017

Low Carb Life: Chocolate Coconut Candy

Candy is of course one of those indulgent things that isn't at all good for anyone, and yet it is so very good. If you look at the ingredients on a bar of chocolate it is loaded with stuff that we shouldn't eat. When you begin a restricted diet, you start to want those things even more just because you have to avoid them...I began researching how to make chocolate and found it to be very easy and if you are on a paleo diet that isn't highly restrictive, making your own is actually okay in limited quantities and dark chocolate that isn't full of sugar and other additives has beneficial properties.

The recipe that I have come up with does have a small amount of maple sugar, to cut the bitterness of unsweetened chocolate, but not enough to make it sweet.


Chocolate Coconut Candy

Coconut Layer
2 cups of unsweetened coconut flakes chopped super fine
1/3 cup of coconut butter
2/3 cup of coconut oil
1-2tsp of maple syrup (if wanted not really necessary)

Melt the coconut oil and butter in a pot. Stir in the maple syrup if using. Add in chopped coconut. Stir until combined and pour into a parchment lined pan. 9x11 seems to work great. 9x13 will make a thinner candy, but you will get more pieces. Put coconut layer in the fridge to harden while you work on the chocolate.

Chocolate
2/3 cup cocoa butter
1/3 cup coconut oil
1 cup of high quality unsweetened cacao powder(cocoa powder can be used but it has less nutrients)
1-2 Tablespoons maple syrup honey or other sweetener (more if you want it sweeter, but I don't recommend it if you are trying to get the sugar out of your diet)

Melt the cocoa butter and coconut oil heating it to about 100 degrees. Stir in the maple syrup and unsweetened cacao powder. Stir the mixture until all of it is incorporated. The mixture will have to be tempered in order for it to work right. Personally I am still working on getting this right but there are many tutorials on the internet. Tempering the chocolate is a way of realigning the crystal structure of the cocoa butter so that it has the correct texture and feel.

When the chocolate is ready and the coconut layer is hardened, gently pour a layer of chocolate over the coconut and put back in the fridge until it is all solid an hour or two. I usually pour a thin layer of chocolate over the coconut and prepare another pan for the rest of the chocolate either to save for another batch of coconut, or to have on it's own.

After it is hardened use the parchment to remove it to a cutting board and break it into pieces. It needs to be kept in the fridge or freezer(if you find it difficult to resist).

Other things can be added to your chocolate, be creative...
If you can have nuts try different kinds depending on your mood.
Add a few drops of mint essential oil
Zest some orange and add it to the top
Dried fruit if you can eat it
Cayenne Pepper
Candied Ginger
Sea Salt
Caramel(if you are not diet restricted)
pumpkin seeds

What would you put in your chocolate?


Saturday, August 6, 2016

Desserts: Chia Seed Pudding with Mangos


My family "needs" dessert...almost every night. A habit that I started and has kind of stuck. I try to stick to baking something about 3 days a week(that may or may not carry over to another day), but I try not to have to fix something every night. Lately, I've been slacking and dessert has been happening a lot less but it seems to be sneaking in a bit more. The other day I picked up some mangos for a really great price without a plan for them...but it's mango and I love mango(so do the kids). I can't seem to peel them fast enough. So I had these mangos and wanted something different, not ice cream, and not baked. Google threw this little gem at me and I had to try it. Chia Seed Pudding and mangos. The recipe calls for Coconut Milk, Chia Seeds, Maple Syrup, and Mango cut into chunks. Very easy, very cool, very weird, I thought it would be a big hit. I loved it, Matt loved it, Nathan loved it, Noah liked it okay and that's pretty much the end of it. Jacob, Evelyn, and Ben just didn't like it. Nathan, Matt and I got extra dessert after picking the mango out for the younger ones. I think the chia seeds are kind of fun, not everyone likes the texture.

Chia Pudding with Mangos

1 can of coconut milk
1 1/2 cups of whipping cream
2-3 Tablespoons of Maple Syrup
3-4 Tablespoons Chia Seeds
Chopped Mango(or other fruit, or no fruit)

Whip whipping cream until thick but not to whip cream consistency seeds will create thickness. Add the coconut milk and maple syrup and mix together. Add the chia seeds and let it sit for about 30 minutes. Let it refrigerate for a couple of hours to overnight(best thickness). layer the pudding and the fruit in a glass. You can serve it immediately or refrigerate until ready to serve.

Whipping Cream can be taken out and all coconut milk can be used if a vegetarian/vegan option is wanted.


Friday, January 1, 2016

Happy New Year 2016

Happy New Year Everybody.


For the first post of the year I am going to post our traditional New Year's Menu. For many years growing up we would have meatball stew with coleslaw and black eye peas. As far as food goes, when I was younger, it wasn't always my favorite. There are so very many other foods in our culinary culture living in South Louisiana that this one just didn't stand out among my top of the list. Now that I am older, and away from home, I miss the opportunity to eat the foods that are a staple at home that may have seemed ordinary fair growing up. We still make some of them living here in Mississippi, but it just isn't the same when you can't find the traditional ingredients, and it really does make a big difference.

One of the biggest things that I have learned over the years is how to make a roux. A roux is the basis of so many Cajun and Creole dishes, but it can be really tricky. It is relatively easy to create any of the lighter rouxs, but when you try to get to the deeper darker roux it takes a bit of time and effort to get it right without going overboard and bringing it to the point of burned and ruined. It is a talent that has been handed down through the generations. My grandparents(probably getting it from their parents before them) passed it along to my parents, eventually my parents taught me how to make it, and as my children grow up they will each get a chance to learn and pass along the information to their children so that they can keep their cultural heritage alive...here's to hoping that it is important to at least one of them, especially since we aren't living in South Louisiana right now. I will post a recipe/tutorial soon on roux.

But back to Meatball Stew. The base gravy of a Meatball Stew requires a roux and the Cajun Trinity. It is very similar to the French Mirepoix(onions, carrots, and celery). I assume that it probably has it's beginning from this mixture and it evolved to the onions, bell peppers, and celery that are a staple in our meals. Like so many other dishes, the meals are very simple in their ingredients, yet complex in flavor.

Meatball Stew

Meatballs

2 pounds of ground meat mainly beef, but a mixture of beef and pork and/or deer can be used.
1 egg
10 crackers crushed(or three slices of bread crumbled)
1/2 finely chopped onion
1/2 finely chopped bell pepper
2 cloves of garlic
1 tablespoon Worcestershire sauce
salt and pepper to taste

Mix all these ingredients together well and form into meatballs and brown until cooked. Some people brown in the oven others swear that it is better to brown in the pot you are using to add more layers of flavor to the meal(I tend to agree with this).

Stew

8 oz. roux
2-3 onions
1 bell pepper
3-4 stalks of celery
3 cloves of garlic
Salt and pepper to taste

When meatballs are done remove and set aside. Sauté the onions, bell peppers, and celery in the pot that the meatballs were cooked in. After about 5 minutes, add garlic and roux(I make my own, but you can use a jar bought from the store if you can find it in your area.) and stir to heat it up with the vegetables. Either add water or a stock that you would like to use. Slowly add the stock and stir. your gravy will thicken as it cooks.  After the stock is added let it cook for about an hour. Check for seasoning.

Serve stew hot over rice. Add your favorite vegetables and a slice of buttered crusty French bread and a glass of red wine to complete your meal.

Our supper was served with the traditional coleslaw for prosperity and black eyed peas for good luck in the New Year.


Thursday, February 26, 2015

Snow Cream

Today we had snow cream...I tried this a couple of years ago when we last had a decent amount of snow fall. I have to say, I really didn't like it too much. It came out soft, mushy, and didn't have much flavor to speak of. Today we tried again with a different recipe and it came out really good. It had a fluffy creamy texture, and had the look of damp sand. It clumped together when it was scooped with the ice cream scoop, but was still a bit crumbly. We made chocolate, and vanilla, but everyone agreed that the vanilla was just better, of course we ended up with lots
more chocolate than vanilla. The secret to this snow ice cream...condensed milk. It was a little difficult to stir in and get evenly distributed, but it was really worth the extra effort.

Snow Cream
Snow...A couple of big bowls full to make sure you have enough.

vanilla extract...I didn't measure I just poured a little bit in.

1 can of condensed milk

Start out with a large bowl half full of fresh clean snow.
Pour about 1/2 the can of condensed milk and vanilla extract in and start mixing. I say mixing, but it will be more of a chopping, scraping, folding, smashing process. The snow quickly freezes the condensed milk and makes it a little difficult to work into the snow, but keep at it until the color is evenly spread throughout. If it gets too mushy add more snow and keep mixing in until you get a texture you like. Scoop and serve.

The chocolate one that I made was a little different because we unfortunately only had one can of condensed milk. I took some half and half and cooked it with a box of chocolate pudding. Cooled it down and added it to some snow. It didn't have enough chocolate flavor or sweetness for ice cream. I did like the texture though. I think next time I will add the pudding mix to the condensed milk. It was a fun and yummy experiment for this cold day...Now hopefully Spring is in the air and we can get to the business of warmer weather.

Wednesday, October 1, 2014

Recipe:Skillet Apples

I thought that this would be a great opportunity to officially welcome in fall and the beginning of October. Skillet apples are a warm and wonderful treat that is very adaptable to either a dinner side dish, breakfast topping, or a dessert or dessert topping. My kids love them and they seem to be their go to side when we go to the restaurants that serve them, so recently, because of an abundance of apples, I attempted them and was very happy with the results...The sweet sauce paired well with the slight tart flavor of the apples. They were tender, with a little bit of crunch still left in the center, and coated with the oh so good, gooey goodness of the cinnamon sauce that they are cooked in. It is a really simple process that doesn't take long...that is if you don't include the time of peeling, coring, and chopping the apples.

Here's what you need: 

8-10 Apples, peeled and chopped
1 stick of butter
1 cup of brown sugar
Cinnamon to taste
2 tsp ground nutmeg

Directions: 

 In a large skillet add the butter and begin to let it melt. Add the apples and let them cook for a couple of minutes. Add the cinnamon, brown sugar, and nutmeg. Continue to cook the mixture until the sugar is completely melted and the sauce thickens. Cook until the apples are as tender as you would like them. Be sure to stir the apples the whole time to make sure that they don't burn. Let them cool and serve them as they are, on pancakes, waffles, biscuits, ice cream, pound cake or anything else that cinnamon butter smothered apples sound good on.

Monday, September 15, 2014

Recipe: Catfish Courtboullion and Corn Macheaux

So here it is, Catfish Courtboullion(cou-be-youn) and Corn Macheaux(mock-shoo). They look nothing like they sound, but both are amazing and full of flavor. It is a childhood dish that I remember having at my Grandparents(Dad's Parents). It's funny how as a child you don't always appreciate good food, but as an adult you crave some of the dishes that you can no longer get because the skilled "chef" is no longer there to make it for you.

Each of my Grandparents, Aunts, Uncles, and of course Parents were well taught in food preparation. Each had a strong point, so were great with baking, some were great with side dishes, but most were very skilled at cooking. I have be very, very lucky to grow up in the region(South Louisiana) that I was in, and blessed to have a family that knew good food.

Most of our family gatherings revolved around food, lots and lots of food. Everyone brought their own specialties and even the small family gatherings turned into feasts, but as usual I have begun to reminisce and have gone off topic. This dish was is very versatile and several different kinds of meat can be used for variety-rabbit, shrimp, chicken to name a few-was usually served with a side of corn macheaux, cole-slaw or a salad, sometimes a potato salad, or green beans and smothered potatoes.

Last night I actually started out making a Sauce Picante, but in the process the "gravy" became a bit soupy-er than I would have preferred and it became a courtboullion which is more of a thick soup/stew. I served it as a stew just because the kids prefer it that way.


Catfish Courtboullion(cou-be-youn) 

2 lbs Catfish Fillets you can cut it into chunks for easier serving
Seasoning for the fish
1-2 tablespoons of roux
4 cloves of garlic
1-2 onions finely chopped
1 Bell Pepper finely chopped
2-3 stalks of celery finely chopped
2 cans of diced tomatoes
1 can of tomato sauce
1/2 tablespoon sugar
3 cups of water or stock
a dash or two of Worcestershire Sauce
hot pepper to taste
Salt and pepper to taste
lemon optional
bay leaf optional(remember to remove before serving)

Directions: Season catfish and return to the refrigerator. Either make a roux, or if you have a jar on hand just use a little of that. Heat the roux in a heavy stock pot. Once it is warm add the chopped onions, bell pepper, garlic, and celery and cook until wilted. Add the tomatoes, the tomato sauce, sugar, worchestershire sauce, water or stock, and seasoning that you would like to add cook until well combined and vegetables become translucent about 45 minutes to 1 hour. Add fish and cook until done. It doesn't take long for the fish to cook. it should flake, but not fall apart. 5-8 minutes.

Serve in a soup bowl with a large scoop of rice, or serve as a stew over rice with less sauce.

Note: what I have pictured is in a plate and more like a stew(sauce picante) than a soup because that the way my family prefers to eat it. What I made could be served in a bowl and has the consistanty of a thick bisque. So if you would like more of a stew texture, add only enough water or stock to adjust the consistency for that. Probably about 1/2-1 cup. It should have more of the consistency of a thick spaghetti sauce. Adding the fish will add liquid to the mixture so be careful not to add too much water to start with.

Also, if you would prefer not to use a roux, it can be skipped, but a big part of Cajun cooking is the layers of flavor in the cooking.

Corn Macheaux(mock-shoo)

3-4 cups of corn
2 tablespoons of butter of bacon fat(yes, I have a jar)
1 onion finely chopped
1 bell pepper(I used 1/2 green, and several mini peppers that were red and orange for color)
1-3 cloves of garlic
1/2 cup of cream or half and half

Melt your fat of choice, and saute the onions, bell peppers, and garlic. Add the corn and cook until the corn is done if it is fresh corn, or heated if it is canned corn. When it is done lower the heat or turn it off, add the cream and stir. Be careful not to add the cream to the corn if it is too hot the cream will separate.


Eggs in a Hole

Eggs in a hole is one of my favorite breakfasts to make, you get toast and eggs at the same time...I don't do it as often as I like, but when I do the kids eat it up. It is easy, cute, and fun and really really good; very similar to the idea of the bell pepper slices with the egg in the center.
You cut out the middle of the bread, put the bread on the skillet making sure that it has contact with the pan so the egg doesn't escape, and break an egg into the center of the hole.
Cook until the egg begins to turn white and flip over to cook on the other side.
 This breakfast is so well liked that a whole loaf of bread, and twenty eggs were used the morning we made this. I can not tell you how happy I am to have chickens that give us fresh delicious eggs daily.

Try it out with your family, you could get creative and use shaped cookie cutters, add the cut bell pepper rings for extra color, or maybe even try using scrambled eggs and add toppings to turn it into a toast omelette.

Thursday, June 26, 2014

Another Baking Adventure: Banana Cake with Caramel Cream Cheese Frosting!

I love cooking and baking, which is odd because most people like one or the other. I guess it kind of follows the way I am with life in general...I tend to like or try to like everything. If I don't know about it I will find out, If you don't know about it I will most likely tell you; sometimes if you want to know and a lot of times even if you don't(this can be problem causing, and I have probably gotten both friends and family frustrated with me because of it)...but I digress. Baking is where I was heading today. It had been a while since I baked something so yesterday when I found a whole bag of bananas that someone had forgotten to put away after coming home from the store, I figured it was a perfect time to bake something...but what? Well of course this takes internet research(that gotta know gene that I have) was it going to be pie, bread, cake, pudding...the ideas with bananas is endless someone even posted banana/tomato pizza(personally not very interested). So after discussing with family and lots of oohing and aaahing over the beautiful internet photos, we had finally whittled the choices down to Banana Cream Pie, Banana Cake, and upside-down banana cake(think pineapple, but banana instead).

So here's what I choose to do:

Banana Cake with Caramel Cream Cheese Frosting...It is so very yummy and definitely on our make again list. The cake was firm, but remained moist and I was able to frost it without it falling apart. There are a lot of cakes that tend to do that on me. Chocolate is my nemesis, but box cake mix an ultimate evil doer(yes, I have four boys).

The cake is delicious on its own and would probably be great baked in a loaf pan as a breakfast treat, but this is cake and it definitely needed frosting so back to the internet for more research on what goes with Banana cake. Butter Cream...too plain, cream cheese...good idea, but will it be enough flavor, Caramel Frosting would be perfect the dark brown sugar off sets the flavor of banana perfectly, but what I wanted was frosting not a poured topping layer. So I had the genius idea of mixing all three(of course so have other people...I looked it up after I finished the cake).

Here is the recipe that I ended up coming up with. It was a combination of several different ones that I found converted from metric measure, and then I made it larger to make a bigger cake.

Banana Cake
2 sticks of butter softened
3 cups of sugar(next time I will use less) I used half white half brown
5-6 mashed Bananas
1 Tablespoon Vanilla
3 Eggs
1/3 cup of milk(or cream)
3 cups of flour
1 1/2 teaspoons of baking soda

Cream the butter and sugar until fluffy, add bananas, milk, eggs, and blend then add the flour and baking soda. Stir gently until combined. Divide into baking pans. This recipe made two 9" pans. Bake in a preheated oven 350 degrees for 40-45 minutes. When a knife stuck in the middle comes out clean its done.

Cream Cheese Frosting
1 cup Dark Brown Sugar
1/2 cup of butter
1/4 cup cream
8 ounces(one block) of Cream Cheese
2 teaspoons vanilla
powder sugar

Melt the butter and brown sugar in a heavy bottom sauce pan and heat until sugar is melted. Add the cream cheese and stir until melted and combined. Let it cool a bit and add in the cream and vanilla. When cooled to room temperature, transfer to a mixing bowl and begin adding powder sugar until you get frosting consistency. The cooler the mixture gets the thicker it will get. If it seems to thin, it may be too warm. Let it sit a while and whip it up again when it is cool to the touch.

If you like Banana and Caramel, Bananas Foster, or any of the other combinations of banana brown sugar this will definitely be on your go to list for cakes.

Try it out and let me know how yours came out. Our kids wanted to eat it for breakfast...

Happy Baking!


Saturday, August 17, 2013

Stuffed Zucchini Squash

Yesterday I came home from our local CSA,Yokna Bottoms, distribution with some great goodies; dragon beans, purple green beans, a variety of peppers, eggplants, a great big bunch of basil for pesto, but the highlight of this pick up was the cutest squash I have ever seen. They were eight ball zucchini squash. I picked out 6 that were about the size of baseballs intending to do something with them for supper since Friday night is one of our meatless nights(at least we try). So here is what I did with them. I should have taken pictures through the process, but forgot.

I scooped the inside out and chopped it up finely. We happened to have a barley pesto salad that I had made a couple of nights previously so I decided to use that and added the chopped zucchini to the barley, then I started going through the fridge to see what could be added and found some feta cheese, colby jack cheese, purple and white onions, and bell peppers. I chopped all the vegetables up finely, and added all the ingredients to the barley pesto. each zucchini cup was then stuffed with the mixture topped each with a pat of  butter and put in the oven and baked. The tops that were cut off were also saved and baked on a separate pan. I baked them for about 20 minutes.

 I served these with a salad that had cucumbers, peaches, and grapes(it's what we had in the refrigerator at the time). These came out really good, so good in fact my two picky boys asked for seconds and one asked for thirds. They were little gooey cheesy bowls of goodness. I will definitely be making these again. Just like so many of my other recipes, it will be very versatile and can be stuffed in so many different ways, I can't wait to try a new filling.

What would you stuff in the great little bowls?

Sunday, August 11, 2013

Another School Year is on the Horizon

So in the next couple of weeks we will begin our next school year adventure. This year we will officially have four of our five children in some type of learning experience. Our oldest will be entering Eighth Grade it is amazing to me that we are on the edge of High School, like the tide coming in and lapping at our feet. We are trying something a little different this year. This year he will be enrolled at a school, have support from teachers and a counselor, and he will be accountable to someone other than just us for getting his work done and assignments completed. Because of the idea of high school looming we want to make sure that he has transcripts and that his knowledge base is well rounded.

Our younger children will be entering the third grade, kindergarten, and pre-k 3. I am hoping that the focus of their year is full of adventures in learning and integrating lots of real life lessons that will back up the things that they learn in "books" this year. Charlotte Mason has a wonderful way of learning and teaching that I would really like to incorporate into their school year.

We will try to document some of our learning this year along with our other projects and happenings at the Zerangue Homestead. Lots of things happening this year and new changes coming up this year, with home improvement, farm changes, lots of garden expansion...stay tuned to watch us grow and change.

Oh and...our new addition!
No not another baby, we've adopted a dog.
Meet Scout

What do you have in the works for your families this year?

Saturday, July 13, 2013

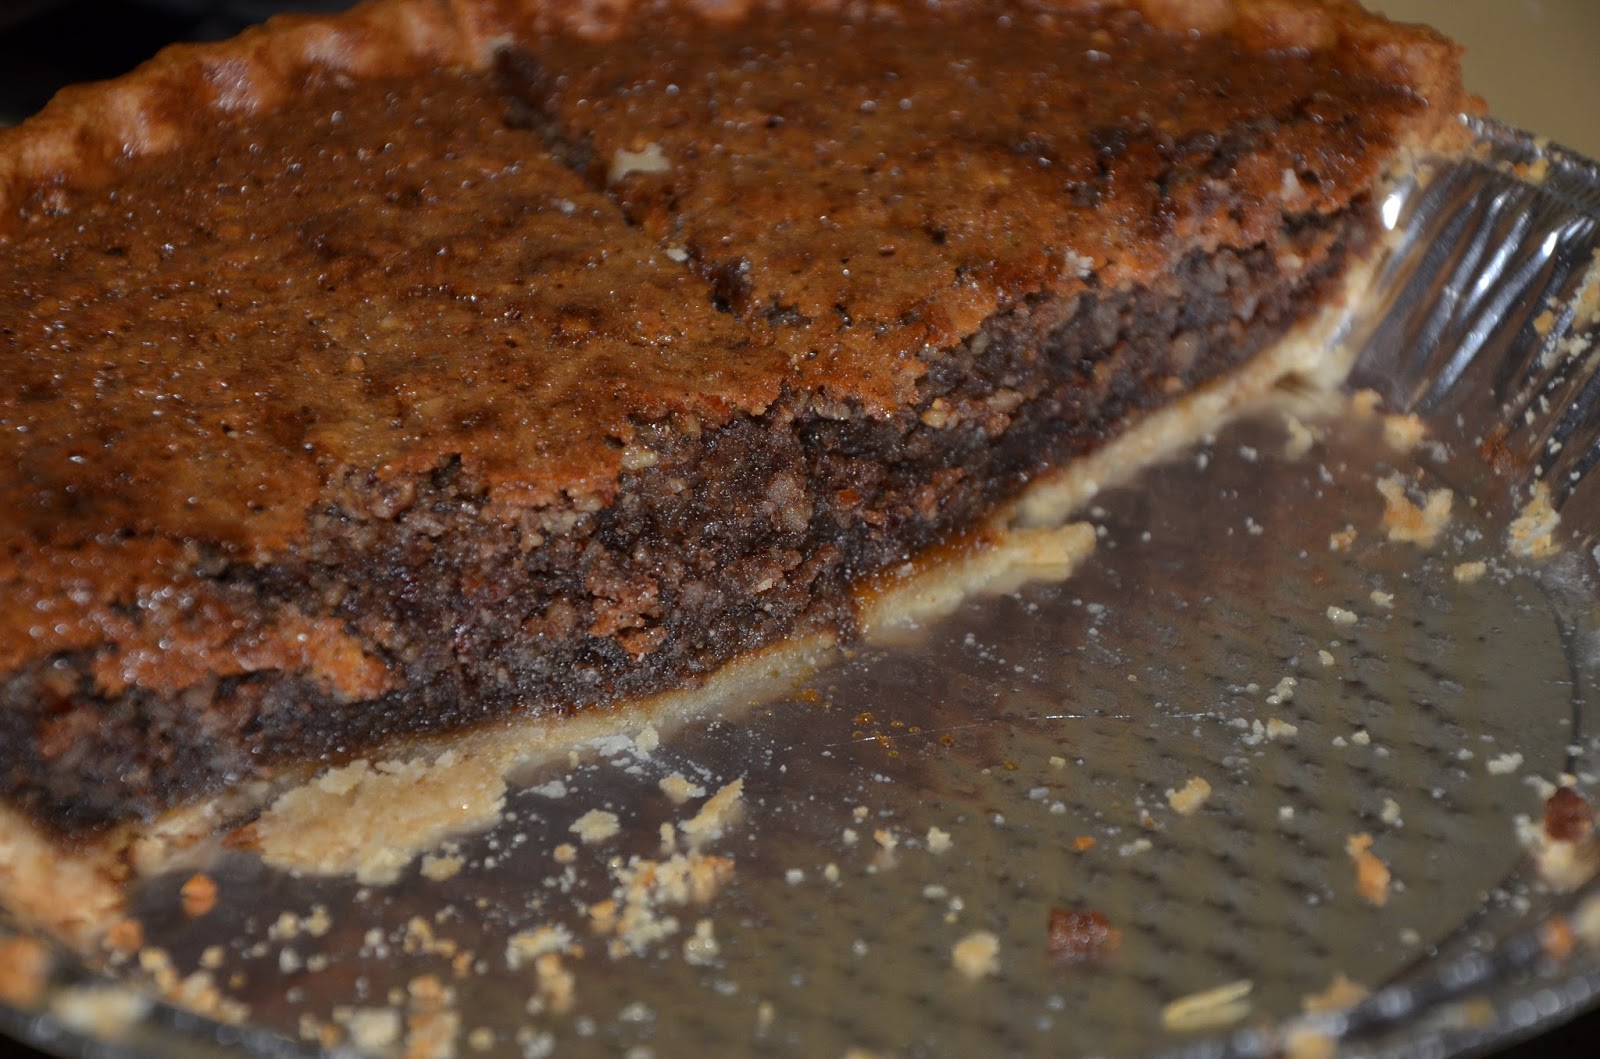
The Pecan Pie

I love pecan pie! It is one of my all time favorites. I used to like making pecan pie too, but my husband didn't like eating the pie that I would make because it wasn't his Grandmother's pie. The regular way was too sweet and sticky to him. So for several years I would try to work on it and figure out the right texture and consistency to make one that we both like. Tonight it finally happened!

Pecan Pie
Ingredients:
1/2 stick of butter
1/2 cup of sugar
3 eggs slightly beaten
3/4 cup of corn syrup, honey, or other syrup
2 1/2 cups of ground pecans(I left some larger chunks so that it wasn't too finely ground and had no chunky texture)
2 teaspoons vanilla

Instructions:
Preheat oven to 350 degrees F. Soften the butter, cream the butter and sugar, add the eggs and blend well. Next add the syrup and vanilla and stir to combine. Stir in the pecans and mix until they are evenly incorporated into the mixture. Pour into the pie shell and cook for 40-45 minutes. When the pie is puffed up it is ready to come out of the oven.


One thing that I did differently was to use brown sugar Rapadura, actually instead of white so the pie is darker in color, and has a little more of a molasses flavor in it.

In the future I would like to experiment with other syrups to see if substituting honey, sorghum, maple, or molasses, would be an option over corn syrup. I know it's still dessert, but if we can make even small adjustments, it will be helpful in our overall health.

This was a great pie! Try it and let me know what you thought...

Wednesday, March 13, 2013

Butternut Squash Apple Gratin


This is a new recipe that I am really excited about; it is very simple, very tasty, very quick and I think like many other recipes I come across it may even be adaptable too. After buying a bulk box of Butternut squash I had to start searching for ways to use it. One recipe I came across was a gratin using apples, leeks, and butternut squash. Personally I do not care for sage too much, and we didn't have leeks so I substituted onions and left out the sage and sherry. Here is what I did.

Butternut Squash Apple Gratin
Recipe:
1 small-medium butternut squash
2-3 tart apples 
2 onions
2 tablespoons of butter divided
ground coriander and/or ginger, nutmeg or other spices that you like to taste
salt and pepper to taste
bread or cracker crumbs(ritz would be good)
parmesan, cheddar, or other cheese that you like

Thinly slice the onions into strips and begin to caramelize them in a cast iron pot using a tablespoon of butter.

Thinly slice apples and butternut squash; I only used the neck part of the squash that was solid and saved the lower part where the seeds were for another dish. Layer the butternut squash on the bottom of the dish overlapping to cover the bottom. Sprinkle with the spices you would like to use and salt and pepper to taste. Layer the caramelized onions on top and then add a layer of apples. Add a layer of cheese, I used parmesan this time, but I think cheddar might be my next choice. If you have enough of the ingredients add another layer of each. Cover with foil and cook for about 30 minutes.

Uncover and top with the bread or cracker crumbs, more cheese, and thinly sliced pieces of butter evenly spaced over the top; bake under the broiler until the cheese is bubbly and turning golden brown on top.

Serve with sides of your choice, or use it as a side dish. We served ours with a side of sauted kale, and a fresh salad.

And just in case you are wondering, we are a typical meat eating family and there were no leftovers that night, most of the kids ate seconds.

This is a really good dish that I would like to experiment more with in the future. Adding potatoes or other vegetables might be worth trying.

Try it with your family and let me know how it turns out...What would you do differently?


Saturday, October 20, 2012

Chicken and Sausage Gumbo

I love fall...I'm sure I have said it before, but it is just the best time of year. Cool weather has been sneaking in here in North Mississippi! Which means Gumbo Time for us! So glad we made a quick trip home for some festival fun with the kids and to pick up the necessary stuff that we just can't find here. We really need to build a smokehouse here, on my ever growing to do list here on the mini homestead.

Here is a version that has evolved over the years...I am not quite sure you can call it a recipe because sometimes it is hard to actually measure in Cajun cooking...you learn by watching, tasting, and adjusting the meal until you get it where you want it. Growing up many meals were prepared with dashes, pinches, and splashes instead of teaspoons and cups. Many times the meals are never the same as the time before, but always wonderful.


Chicken and Sausage Gumbo

1-2 Chickens cut into pieces. You can also use boneless pieces too to make it easier, but be sure to use both dark and white meat. Note: the whole chicken with the bones makes a difference in my opinion more flavorful.

½ -1 lb smoked sausage. You can use some fresh sausage also. If you can’t find real smoked sausage adding a bit of liquid smoke helps to make the flavor more authentic….not exactly the same though

½-1 lb Tasso(smoked pork meat) It can be left out if you can’t find it.

2/3 pint of roux or more depending on how dark or thick you like your gumbo

2-3 onions chopped

2 Bell Peppers chopped

2-4 stalks of celery chopped

4-6 cloves of garlic

Salt, pepper, and or Cajun Seasoning to taste

2-3 cups of uncooked rice depending on how much rice you like in your gumbo and how many people are eating.

Chopped parsley about a bunch

Chopped green onions about 6

Hot Sauce if needed

First using a large gumbo pot, start boiling your water or stock about 6 quarts. Stir in your roux making sure that it has all dissolved and does not stick to the bottom of the pot. Sometimes it helps to heat the roux first in the pot then slowly add the water/stock to the pot to make sure it is dissolved. Bring this to a boil and cook while you prepare the other ingredients.

Season chicken with Cajun seasoning and brown in a large heavy bottom skillet, it doesn’t have to be cooked through just to get a start on the outside. Add the sausage and  tasso cut into bite sized pieces, and if using fresh sausage cook with chicken first then slice into pieces. Remove meat from the pot and set aside. You can add the sausage and tasso to the gumbo pot, not the chicken.  
Add all the chopped vegetables (onions, peppers, celery, garlic, NOT parsley or green onions) to the pan that you browned the meat in and sauté until the vegetables are wilted and slightly caramelized, but not burned. It is important to brown all ingredients before throwing into the gumbo pot…it adds another layer of flavor which is the key to Cajun cooking …layers of flavor. You can’t rush good cooking. When done add to gumbo pot and let everything cook for a while. 30 minutes – 1 hour. Test for seasoning and add if needed.

Add the chicken last so that it doesn’t over cook and fall apart in the pot. Wait until the last 30 minutes of cooking time.

Just before serving, add the parsley, and green onions. Be sure to test for seasoning again.

Cook a pot of rice to serve with the gumbo.

Sides that go with gumbo
Potato Salad
Baked Sweet Potatoes/Yams
French bread with butter and garlic

Note: if you are serving it to company cook the day or two before put it in the refrigerator, skim the excess oil from the top after it is chilled(there will be some, there is always some extra oil on the top of the gumbo). Doing this will help the flavors to combine better; it is always better the next time. Reheat and serve. Freeze left overs for another time and it is even better.

Sunday, September 16, 2012

German Potato Salad


I am not sure if it is a change in the weather, the fact that October is just around the corner, or some of those pregnancy hormones  are kicking in and making me crave things, but I have been wanting this for about two weeks now. It was one of my favorites as a child and still is. So tonight Matt is grilling pork chops and I am making German Potato Salad and sauteed cabbage with onions and bacon.


Ingredients
German Potato Salad
  • 6-8 medium red potatoes, scrubbed
  • 3 slices of Thick cut bacon, cooked and diced
  • ½c apple cider vinegar
  • ½c - 1c water
  • 3½ Tbsp sugar
  • 1 tsp salt
  • ¼-1/2tsp black pepper
  • 3-4 Tbsp fresh parsley, minced (optional)
Instructions
  1. Place potatoes in a large pot and fill with water until potatoes are completely covered by 1-2 inches of water. Bring to a boil and cook until mostly tender, about 10 - 15 minutes. I try not to cook them too long because if they are not too soft they are easier to cut. 
  2. Drain and allow to cool before peeling and slicing into ¼” thick slices. I don't bother peeling potatoes.
  3. In a pot, saute onions in some of the bacon drippings. Cook until translucent and add potatoes cook for about 5 minutes.
  4. Here is where I cook mine a little different: measure sugar and stir into water until it is melted. Add to pot along with vinegar and bacon.  Stir it all up well  and let it cook until the potatoes are as tender as you would like it and the "dressing" has cooked down and thickened into a sauce; about 10 minutes. I like doing this instead of making the dressing separate and tossing it into the potatoes, because the potatoes have time to absorb the flavors and the dressing thickens with the potato starch instead of adding flour, starch or other thickeners.
  5. Serve warm. 
Note: The water is listed as 1/2 to 1 cup of water. If while cooking the potatoes look dry add a little water as needed. Also, if you like your dressing sweeter or tangier, adjust with the vinegar and sugar, just add a little of each until you get it the way you like.

It is an easy recipe that I wish I would remember to use more often.
If you try it out let me know what you think. 

Sunday, June 17, 2012

Nothing Says Lovin' Like Blackberry Pie

The fruits of the season, I love this time of year. It is the best time of year for so many fresh fruits and vegetables...especially wild fruits. I remember growing up how much fun it was to go out and find wild blackberries, and pecans, going fishing or crabbing...all in their respective seasons of course.We would pack a lunch and go out for the day armed with lots and lots of old gallon sized ice cream buckets. Yes, there were always the little inconveniences that you always had to deal with...the bugs, the heat, the briers, getting fussed at for being hot, tired and ready to go way too early. These trips always instilled something in us that I will definitely do my best to pass on to my children...a love and respect for nature, a knowledge of where our food comes from, a sense of gratefulness, and the feeling of accomplishment that comes with the harvesting of  food. 


After a day of picking, many times our grandmother was with us, we would go back to my grandparents house and Ma-mom would immediately start working on a pie dough. There was nothing better than unpacking, sorting rinsing and packing all of our finds while the smell of fresh blackberry pie filling was cooking on the stove. So yesterday, since I didn't have quite enough berries to make blackberry preserves, I made a pie like Ma-mom would have made. 


So Back to the subject at hand:

The Pie!
Blackberry Pie

Pie Filling:
5-6 cups of bzlackberries

1/2 - 3/4 cup of sugar (depending on the sweetness of the berries and your personal taste.)
1 tablespoon of lemon juice
3 table spoons of corn starch(or other thickener)
a little water

Pie Dough:
2 1/2 cups of flour
1 cup of butter cut into small chunks
1/4-1/2 cup of ice water
1 tsp vanilla extract
1/2 tsp almond extract(optional)

Make the filling: On the stove combine the sugar, water and lemon juice and cook and stir on low heat until sugar is melted. Add the berries bringing to a boil and cooking until the water is reduced. Add the corn starch mixed with a little water and stir until it comes back to a boil and thickens. Set aside to cool a bit.

Make pie dough: Put flour in the mixing bowl and add small chunks of cold butter cut the butter in with two knives or a pastry cutter(or use a food processor for that step) until it reaches the consistency of a coarse cornmeal.  Slowly add the water just until it comes together and forms a ball you may or may not need all of the water. Chill the dough up to an hour to let the butter cool and the gluten in the flour relax. Cut the dough in half and leave half in the fridge until you use it. Roll out the bottom crust  and put it into the pan. Add the pie filling. Roll out the top crust if you want to make it decorative you can use a cookie cutter to cut out shapes, or cut out strips and make a lattice top by weaving the pieces on top.

Bake the pie at 350 degrees F. until the crust is just beginning to brown on the edges, about 15 min. depending on your oven.

Monday, March 12, 2012

Sourdough English Muffins

Over the last 15 years I have tried several times to make sourdough with a homemade starter and have never been very successful...Recently I bought a true starter and started making sourdough this past week and had to share a recipe that I adapted from King Arthur Flour Recipes. These came out so good! A true starter really does make a difference. 

So far, last week, in the process of getting our new starter ready to use I have tried Sourdough Chocolate Chip Cookies, these English Muffins, some hamburger buns that we used for pulled pork, today I will be making pizza crusts for supper, tomorrow we will be trying pancakes, and hopefully on Wednesday the starter will be ready for an actual loaf of bread or two. I would have taken a picture of the cookies if they hadn't disappeared so fast, and forgot to take a picture of the buns, but they were very good, similar to Schlotzsky's. So far it has been lots of fun, I'm hoping that I can keep up with the baking.


Sourdough English Muffins
Yield: about 20 muffins
Sponge:
2 tablespoons (7/8 ounces) granulated sugar
2 cups (16 ounces) warm water, 105° to 110°F
1 tsp. or less of instant yeast 
1 cup sourdough starter

Rest of Dough:
7 to 8 cups Unbleached Flour
1/4 cup melted butter or other oil
1 tablespoon salt
Cornmeal or Semolina for dusting

In a large mixing bowl, dissolve the sugar in the warm water. Stir in and dissolve the yeast, and then mix in the sourdough starter and 1 cup of flour. Let this sit for two hours.

Add the butter, salt, a second cup of flour, and beat well. Add 5 to 6 cups of flour, one cup at a time, to form a dough that holds together and pulls away from the sides of the bowl.

Turn the dough out onto a lightly floured surface and knead it about 8 minutes. Add flour only as necessary to prevent sticking.

Place the dough in a greased bowl, turning it so that a thin film of oil coats all sides. For less sour flavor use in 1 ½ to 2 hours; for more sour flavor let it sit overnight, or up to 24 hours, in the refrigerator.

When ready to use your dough turn it out onto a lightly floured work surface, cover it and let it sit for a few minutes …if it was in the refrigerator let it come up to room temperature.

 Divide the dough into two pieces and roll each piece out separately to a 1/2-inch thickness. Cut the dough into 3-inch rounds; re-roll and cut any remaining scraps. Place the rounds, evenly spaced, onto cornmeal- or semolina-sprinkled baking sheets, sprinkle them with additional cornmeal or semolina, cover a towel, and let them rise until light and puffy, about 1 hour.

Carefully transfer the rounds (as many as a time that will fit without crowding) right-side up to a large electric griddle preheated to 350°F, or to an ungreased frying pan that has been preheated over medium heat. Cook them for about 10 to 12 minutes on each side. Remove them from the griddle and cool on a rack.

Note: If you find you're having trouble getting the muffins to cook all the way through on a griddle, cook on both sides as directed, then finish in a 350°F oven.